Definition of Missing Inventory
Missing Inventory can be categorized into two main types:
-
Inventory Found in the Field but Not on the Map: This refers to existing items that are discovered during a survey but are not listed in the current inventory records.
-
New Inventory to Be Built: This involves the identification of locations where new inventory needs to be added, such as the construction of a new pole at a specific point.
Step-by-Step Guide to Recording New Inventory
Step 1: Start the Process
- Open the Build Module in your asset management system.
- Select the "New Inventory" option when prompted.
Step 2: Select Inventory Type
- Choose "New Inventory" based on the requirement.

Step 3: Choose Specific Inventory Type
- Select the Inventory Type from the dropdown menu.
Step 4: Specify Inventory Details
- For new inventory, select the relevant type (e.g., Pole, Chamber, or Missing Section).
Step 5: Confirm Selection
- Ensure the selected inventory type is correct and click Save & Continue.


Step 6: Select Access Structures
- Choose the access structures for the new section to specify the start and end points.

Step 7: Select First Access Structure
- Select the first access structure where the new section will start.

Step 8: Select Second Access Structure
- Select the second access structure where the new section will end.

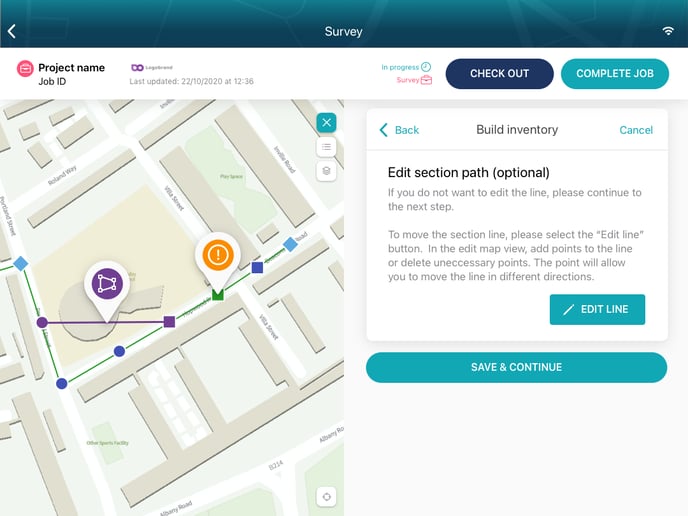
Step 9: Edit Section Path (Optional)
- If needed, edit the section path by selecting the "Edit Line" button.

Step 10: Save Changes
- Add new points, move, or delete points as necessary. Once done, save your changes.

Step 11: Add New Section Details
- Select the position of the new section from the dropdown menu.
- Add the reasons for adding the section and any additional notes.
- Optionally, add a photo to provide visual context.
- Click Save Section Details to finalize.

Step 12: Finalize Updates
- Confirm all changes and complete the job by checking out of the system.
If you need more help, please refer to other articles in our knowledge base or contact support.